


The Trail Elbow Mistake: A Comprehensive Guide to Slicing and How to Fix It
In the world of golf, a persistent issue many players face is the dreaded slice. While countless golfers focus on adjusting their swing mechanics to counteract this issue, one crucial factor often goes unnoticed: the position of the trail elbow at setup. Instructional expert Harry Shaw has demonstrated that simply adjusting the orientation of your trail elbow can have a profound impact on your ball flight, even if your swing remains unchanged. Let’s delve deeper into understanding this common mistake and how to rectify it effectively.
Understanding the Slice: The Role of the Trail Elbow
Most golfers are aware that a slice signifies a ball that curves significantly to the right for right-handers and to the left for left-handers. While it’s easy to pinpoint the flaws in your swing, a closer look reveals that many slicing issues originate well before the club moves. Specifically, the positioning of your trail elbow may be impeding your ability to hit the ball straight.
When the trail elbow is misaligned, it can lead to swings that force the club off its optimal plane, perpetuating an open clubface at impact. However, by simply adjusting your elbow orientation, you can facilitate a more natural swing path that results in cleaner, straighter tee shots.
The Mistake: Trail Elbow Facing Out Instead of Down
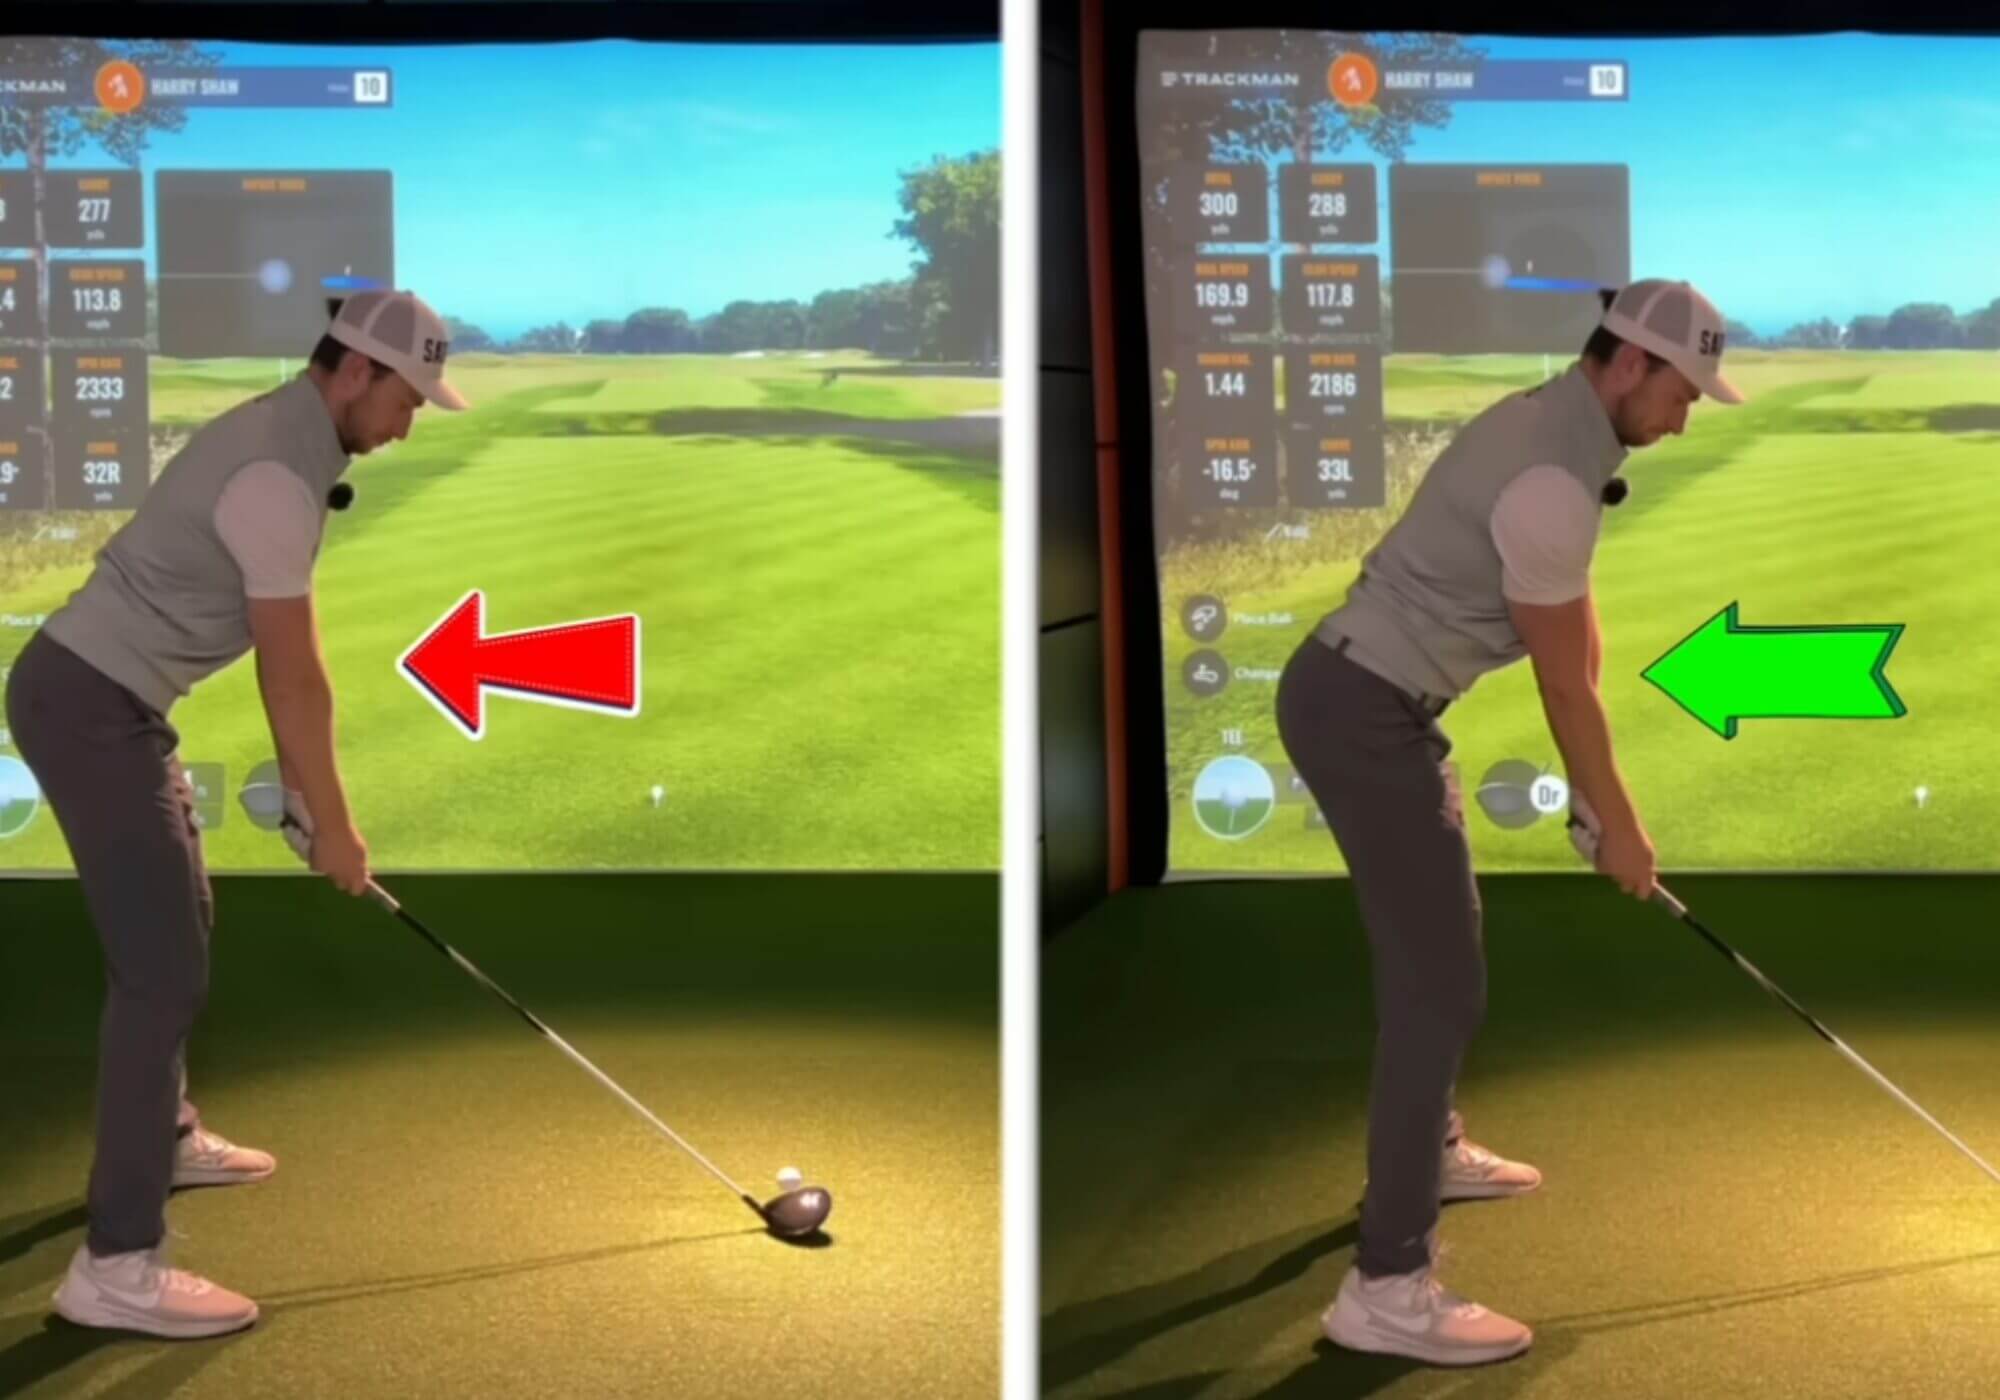
Shaw’s analysis of swing mechanics illustrates a striking comparison: two swings with identical tempos can produce vastly different outcomes, largely due to the position of the trail elbow during setup. The common error many golfers make is allowing the elbow to point outward instead of downward.
- Incorrect Position: When the elbow faces outward toward the camera (a result of internal rotation), it becomes restricted.
- Correct Position: Ideally, your elbow should face down and slightly toward your body, a stance known as external rotation.
This outward positioning restricts the natural folding of the arm during the backswing, forcing golfers into one of two compensations: either lifting the club steeply or dragging it behind the body too flat. Such compensations invariably lead to an outside-in path, reinforcing the slice. In contrast, a properly set elbow allows for a more dependable swing plane, leading to improved shot accuracy.
The Fix: Harry Shaw’s Trail-Arm Setup Routine
To address the trail elbow mistake and set yourself up for success, Shaw offers an effective and straightforward routine designed to establish the correct arm orientation every time. This routine should particularly resonate with those struggling to eliminate the slice.
Step 1: Arm Out Front, Palm Down
Initiate your setup by extending your trail arm straight out while keeping your palm facing the ground. This position represents the incorrect internal-rotation setup.
Step 2: Rotate the Palm Upward
Next, you should gradually rotate your palm upward until it faces the sky. This motion facilitates an externally rotated arm and brings your elbow down toward your body.
Step 3: Grip the Club Without Losing Elbow Position
Finally, while holding the club with your normal grip, ensure that you maintain the following key aspects:
- Your elbow remains directed downward.
- A slight bend exists in your trail arm.
- Your arm stays in front of your ribcage, avoiding any flaring to the sides.
This routine not only improves your elbow positioning but also sets the stage for a more effective swing.
Bonus Drill: The Towel Connection Fix
In addition to the setup routine, golfers can incorporate a handy drill known as the towel connection fix to build awareness of their elbow position. Although often performed with a headcover, this drill is incredibly effective in promoting proper swing connection while reinforcing the correct elbow alignment.
How to Execute the Towel Drill
- Place a towel or headcover between your trail upper arm and your chest.
- Follow the elbow-rotation routine described above.
- Make small to full backswings while keeping the towel gently pinned in place.
This drill encourages a natural folding of your trail arm, fostering superior connection throughout your swing and ultimately leading to a better square clubface at impact. The key is to apply only enough pressure to keep the towel from falling, allowing for a more organic swinging motion.
The Importance of a Consistent Setup
Having a consistent and proper setup is critical for achieving reliable results on the golf course. The minor adjustment of your trail elbow can significantly alter your shot outcome, preventing compensatory adaptations that often lead to an inconsistent swing. With Shaw’s trail-arm routine and awareness from the towel drill, golfers can establish a dependable action that promotes stronger, straighter golf shots.
Final Thoughts: Mastering the Trail Elbow for Better Shots
If your trail elbow is angled outward, your club is already playing catch-up against your body’s natural biomechanical constraints, resulting in compensatory swings that ultimately open the clubface. By employing Shaw’s simple trail-arm routine, you can position the club into a state that encourages smoother sequencing, easier shallowing, and ultimately, a more predictable ball flight.
Indeed, perfecting such a minute detail within your setup may seem like a small adjustment, but the impact it can have on your game is substantial. It’s important to commit to this routine consistently, and in time, you may find that you’ve transformed not only your setup but potentially your entire golfing experience.
By cultivating awareness around your trail elbow’s positioning, you can embark on a journey toward straighter shots and reduced slices, setting a foundation for more successful rounds in the future. Embrace these techniques, and your game could see remarkable improvements with smarter, more intentional practice.
Keep Practicing
As with any aspect of golf, repetition and practice are key to integrating these changes into your game. Make it a point to implement these tips into your pre-shot routine, and you may find that your slice becomes a thing of the past, leaving you to enjoy the thrill of the game in a whole new light.
The journey to a straighter, more consistent shot begins with this simple adjustment. So, take the time to focus on your trail elbow position, apply Shaw’s proven techniques, and watch your performance improve on the green.
This article serves as a guide to understanding the impact of your trail elbow on your swing and how to fix it for better performance. For more insights on improving your golf game, continue to explore resources like MyGolfSpy that provide valuable tips and tricks for enthusiasts of all skill levels.


